RVL-based Module
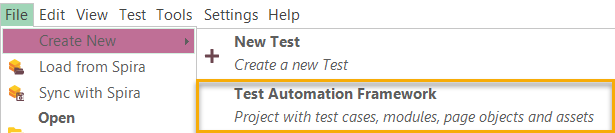
Let's take a look how it works. First we will create a new Test Automation Framework.
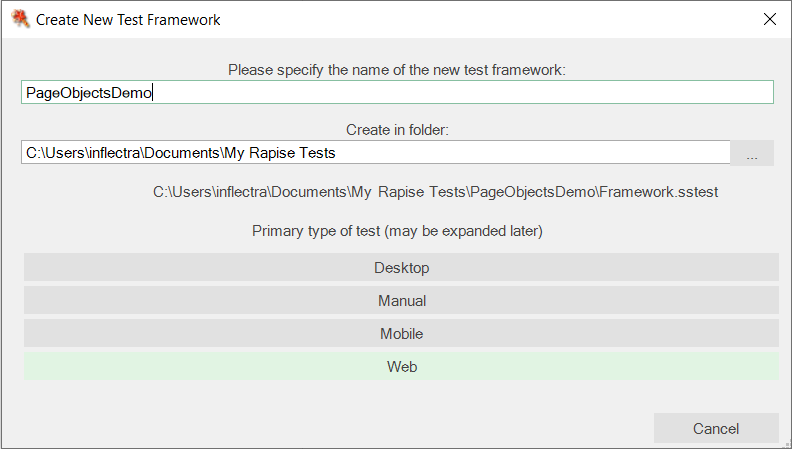
Name it PageObjectsDemo and choose Web test type.
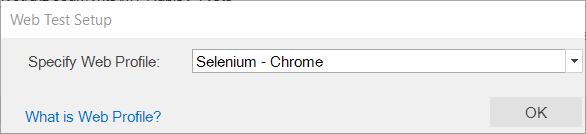
Choose Chrome browser profile.
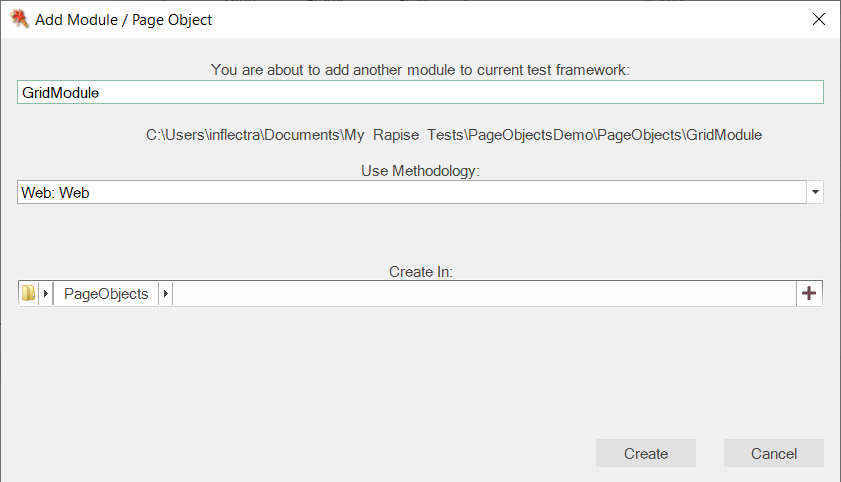
In the Object Tree pane right click Modules/Pages and choose Create Module/Page Object.

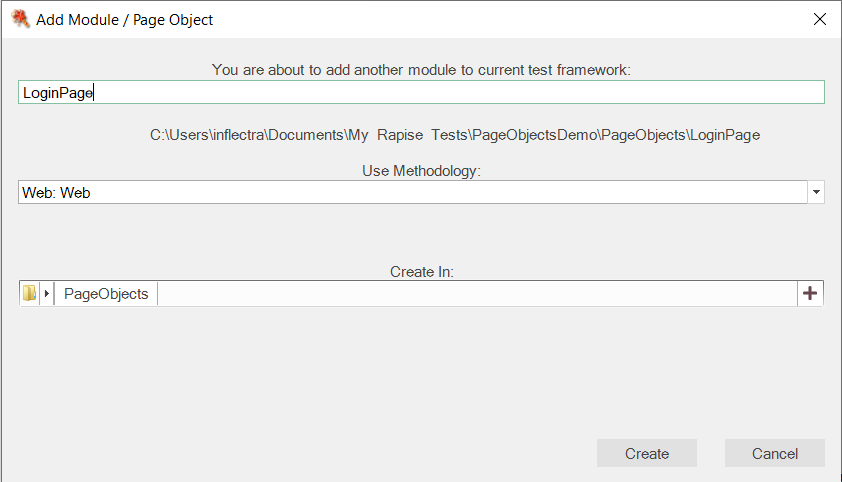
Give it a name LoginPage and click Create button.
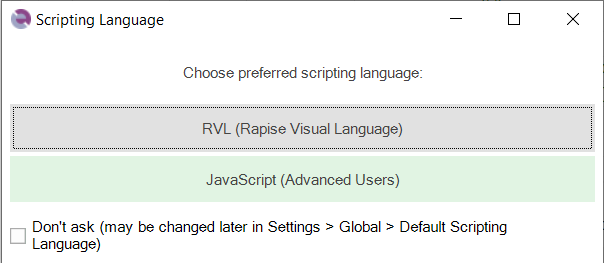
We are going to create an RVL module, so choose RVL option.

LoginPage RVL will be created.
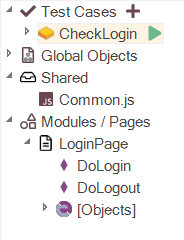
And LoginPage module will appear in the Object Tree.
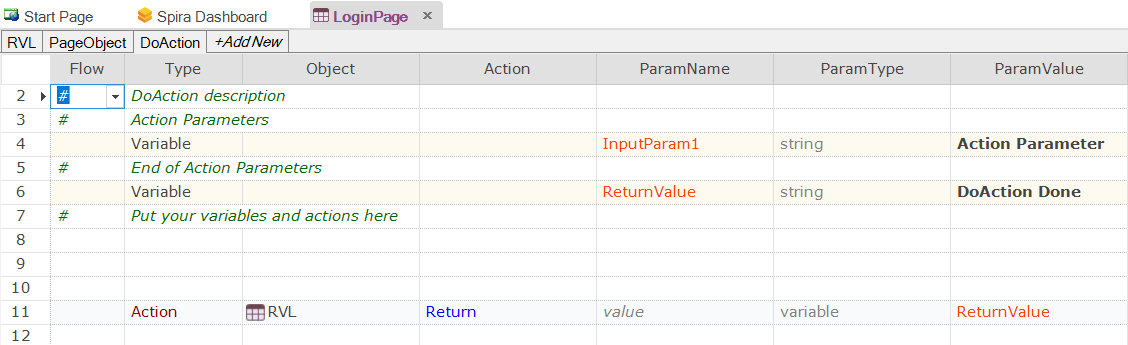
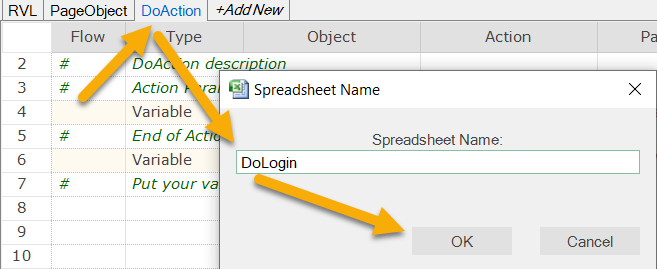
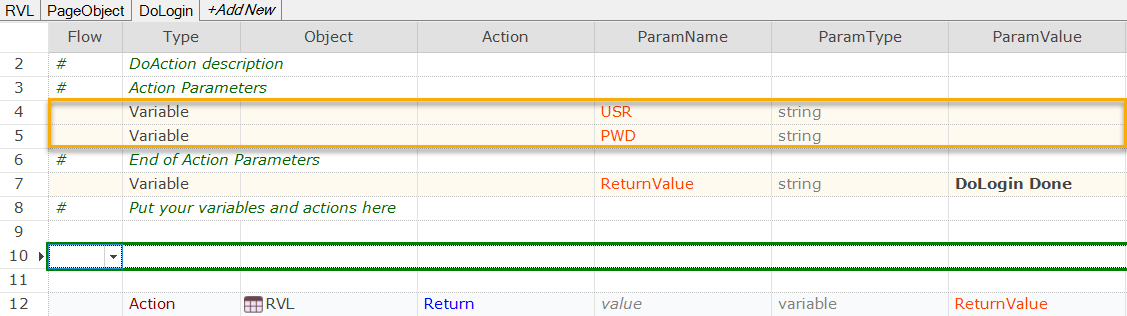
Our page object has a default action DoAction, you may see it's name in RVL tabs. Double click it and change to DoLogin.
Define two input parameters for this action: USR, PWD.
We will now record a login sequence of steps on https://libraryinformationsystem.org with credentials librarian/librarian. Make sure that the LoginPage RVL document is still active and click Record button on the toolbar. You will see the Choose Test Case dialog with LoginPage selected.
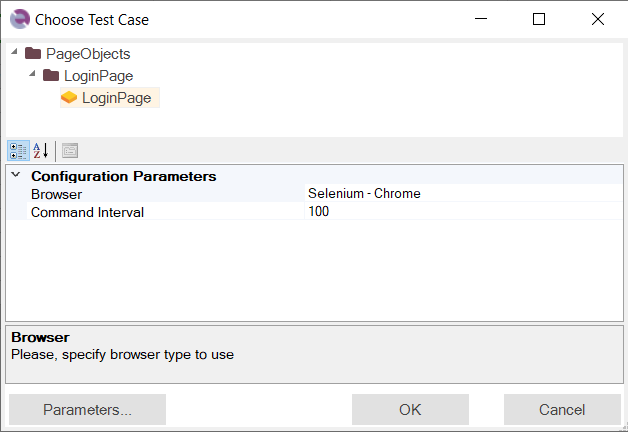
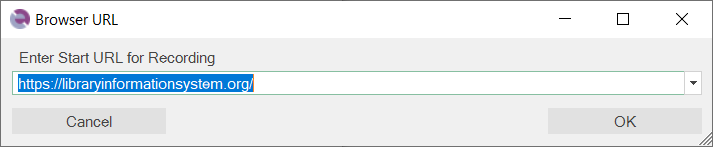
Click OK and record the login scenario. Enter the URL when prompted.
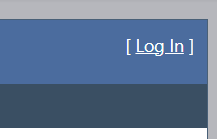
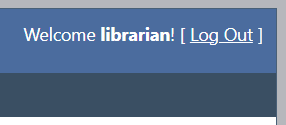
Click the Log In link.
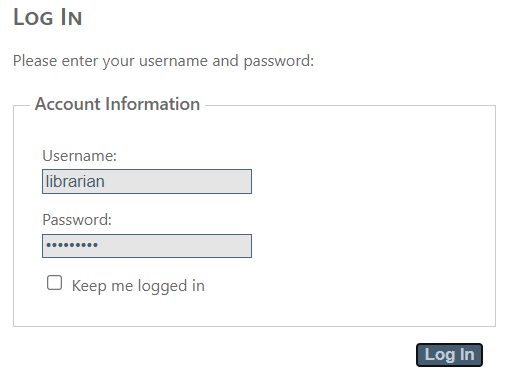
Enter username and password and click Log In button.
Click Finish in the Recording Activity dialog.

Select line 10 and click Insert Here button.
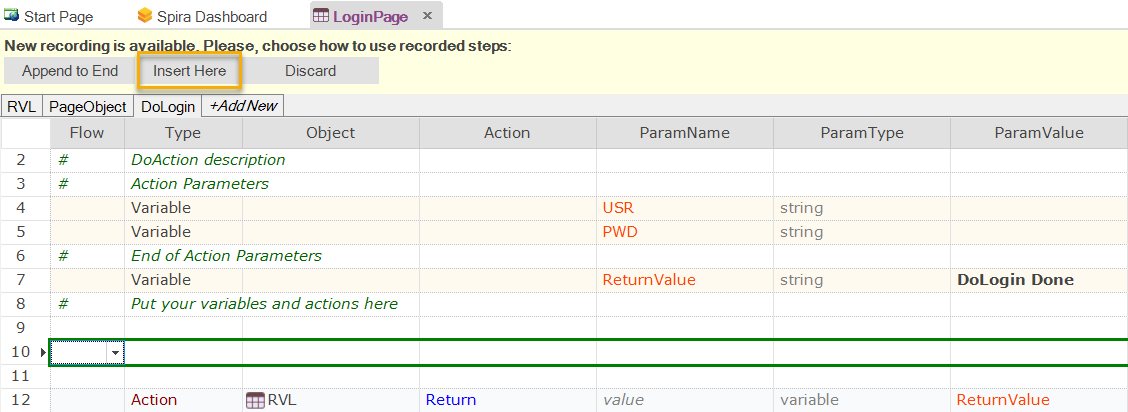
You will see the steps inserted.
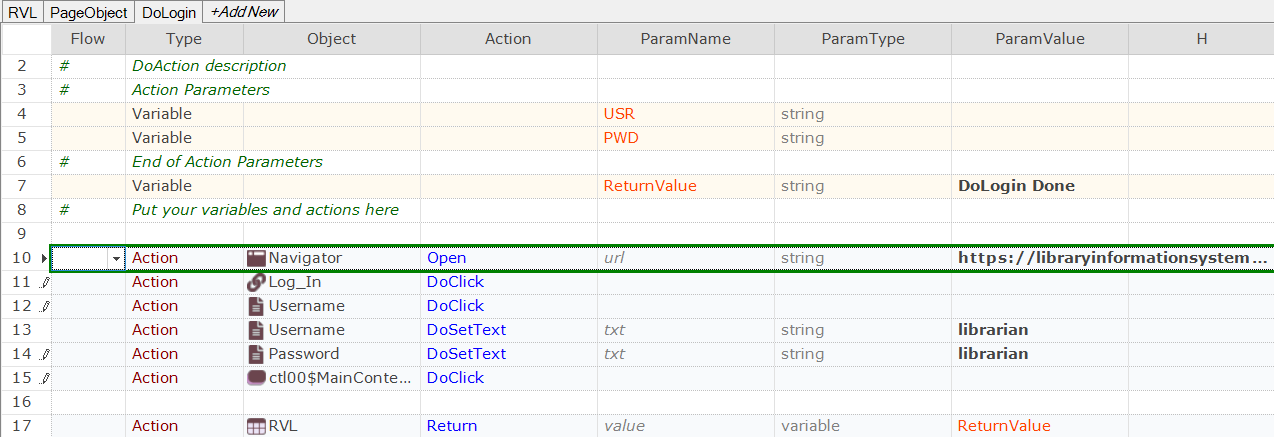
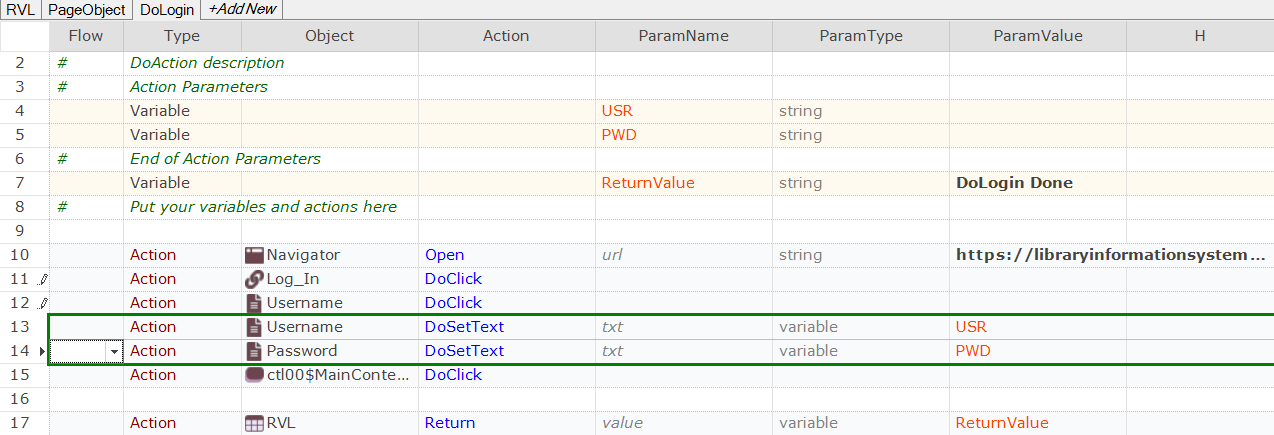
Bind Username and Password fields to USR and PWD input parameters.
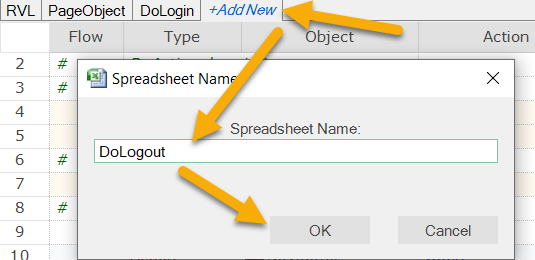
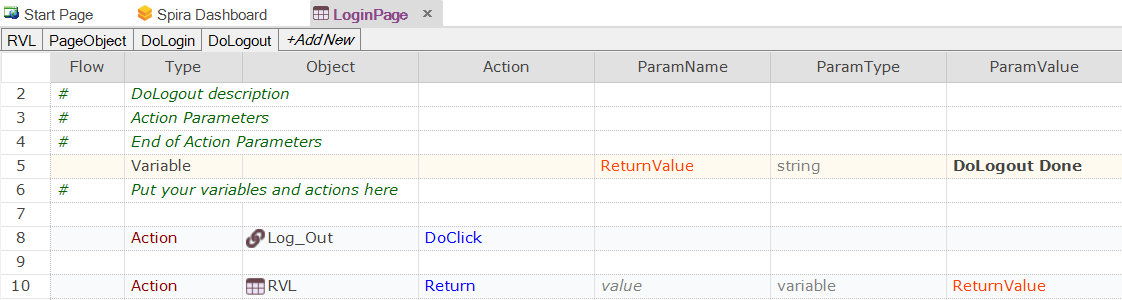
DoLogin action is ready to use. Let's now create one more sheet DoLogout.
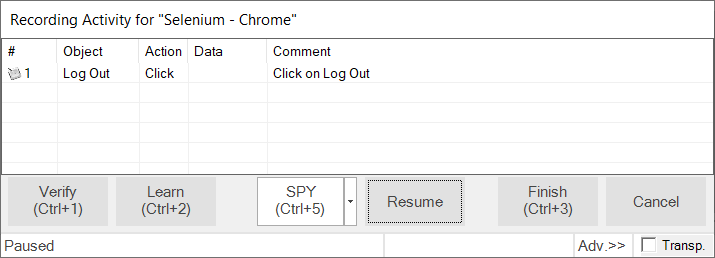
Click Record on the toolbar, click OK in the Choose Test Case dialog. Rapise will reconnect to Chrome. Just click on Log Out link.
Click Finish in the Recording Activity dialog.
Insert the recorded steps, remove the default parameter for the DoLogout action. You will see the result.
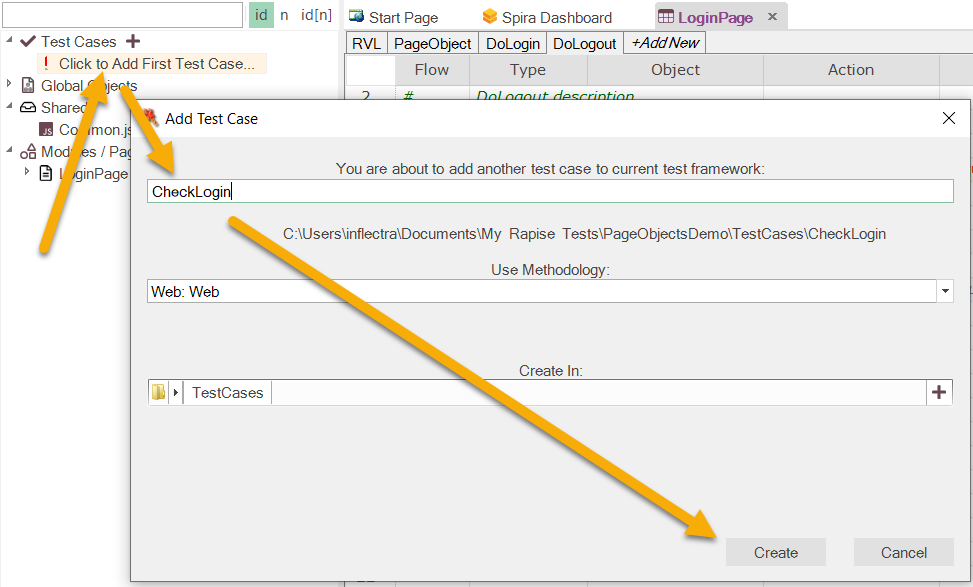
We are now ready to create the very first test case.
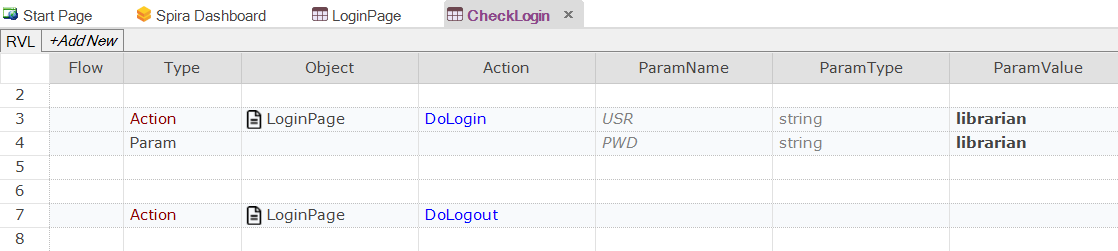
In CheckLogin RVL use LoginPage module like this:
You may now run CheckLogin test case, just click Play icon against the test case name.
After execution you will see the report:

If you wish to close the browser at the end of each test case please refer to Recommended way of executing code before and after each test case.
JavaScript-based Module
Let's now create JavaScript module with name GridModule.

GridModule.js will be created and opened.
Change it to
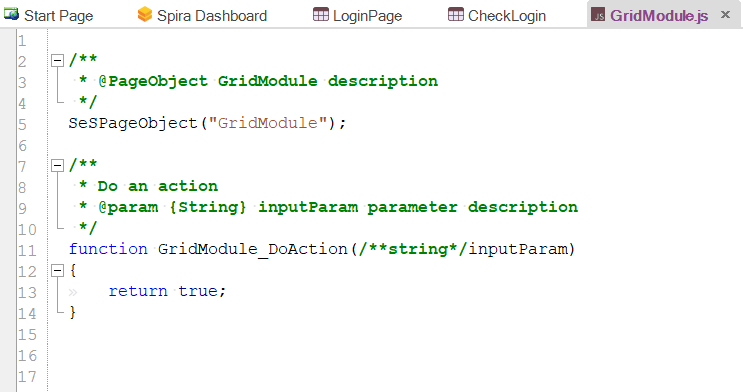
/**
 * @PageObject GridModule description
 */
SeSPageObject("GridModule");

/**
 * Get the number of rows in the main grid
 */
function GridModule_GetRowCount() /**number*/
{
	var /**HTMLObject*/ tableObj = Navigator.SeSFind("//table[@class='dataGrid']");
	if (tableObj)
	{
		var rowCount = tableObj.DoDOMQueryValue("count(.//tr)");
		return rowCount - 1;
	}
	return -1;
}
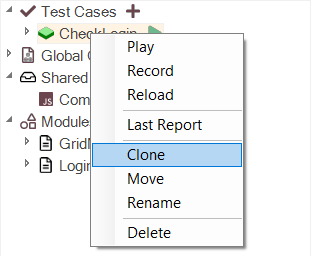
Now we may use it in a test case. Let's create new test case with name CheckGrid by cloning existing test case CheckLogin.
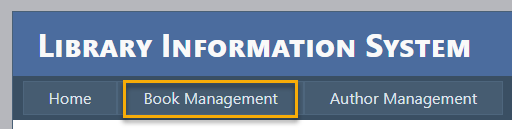
Make sure that you are logged into the Library Information System in Chrome and record click on Book Management link.
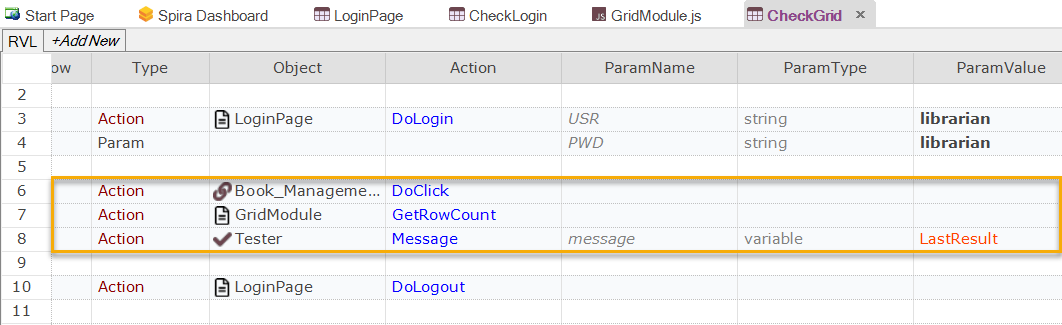
Then update the CheckGrid RVL to look like this:
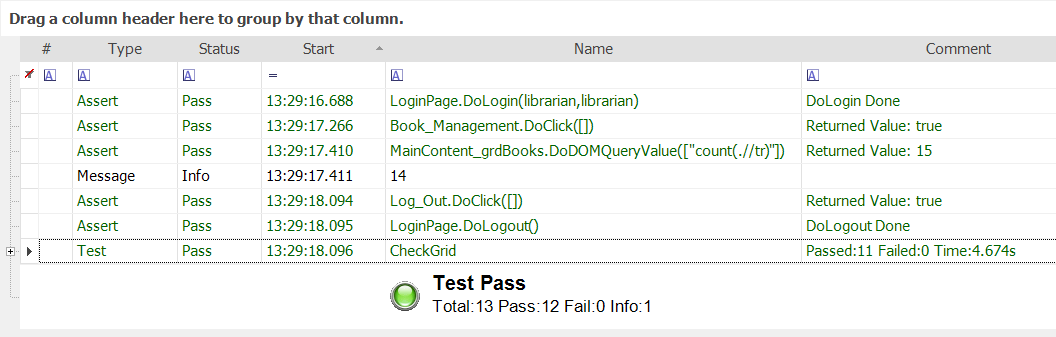
Logout from the Library Information System in Chrome and play CheckGrid test. You will see the report.
Note: the framework created in this article is attached.